SharePoint Online では個々のユーザーが自分のサイトに表示される言語を変更したり、既定の SharePoint 言語とは異なる言語でサイトを作成できるようにすることができます。例として、ユーザーがサイトを英語で表示するための設定をご案内いたします。
個人用言語の設定
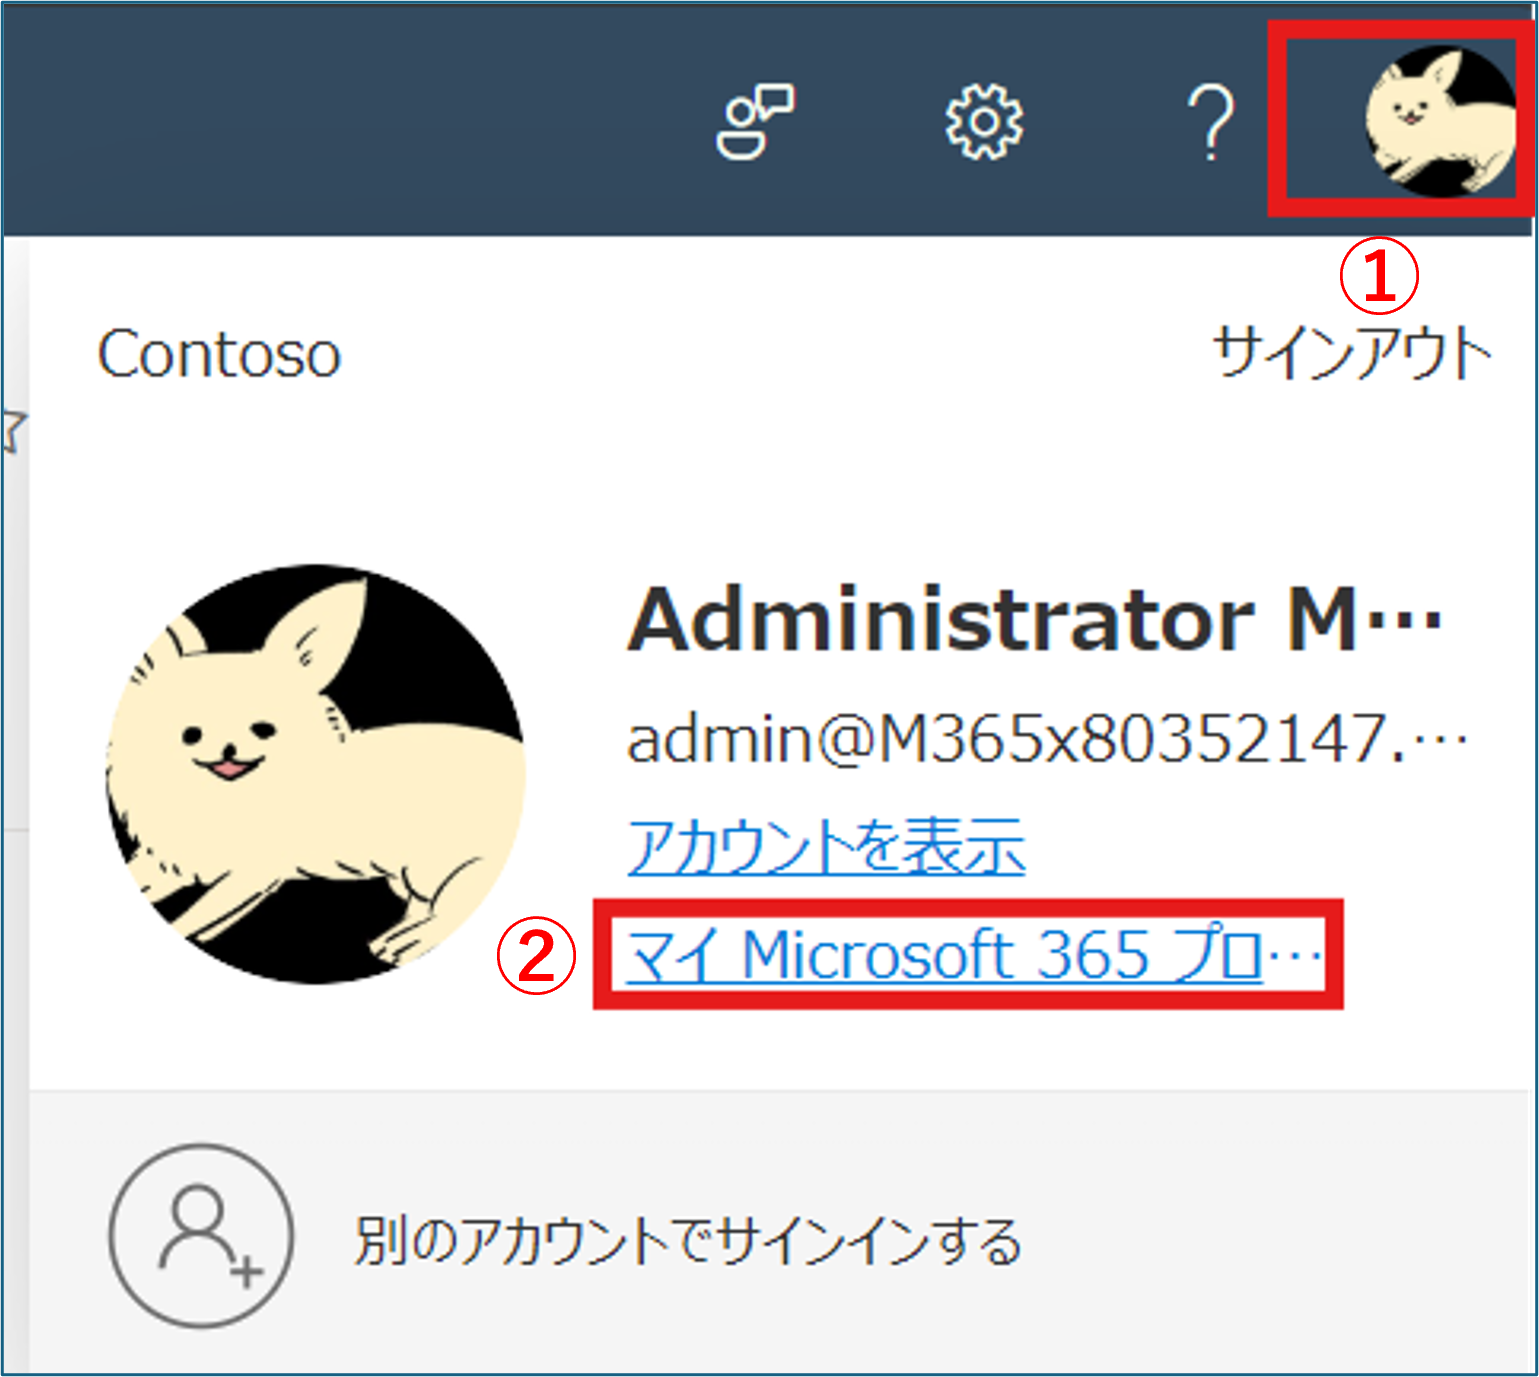
1.ユーザー個人のアカウントで SharePoint サイトまたは Microsoft 365 にサインインします。①画面右上のユーザーアイコンをクリックし、②【マイ Microsoft365 プロファイル】を選択します。
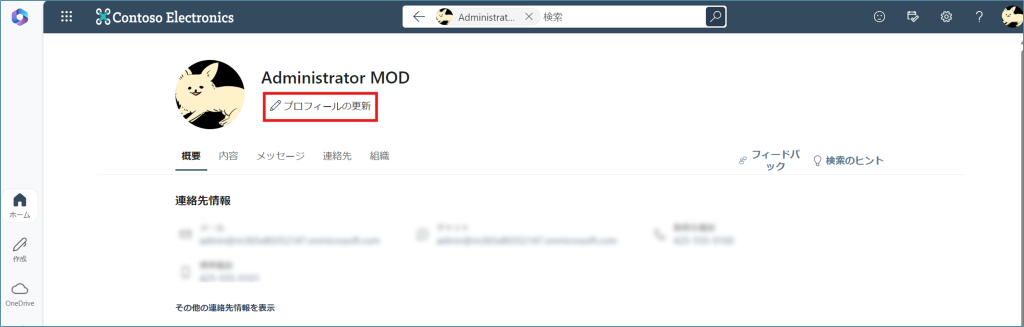
2.【プロフィールの更新】をクリックします。
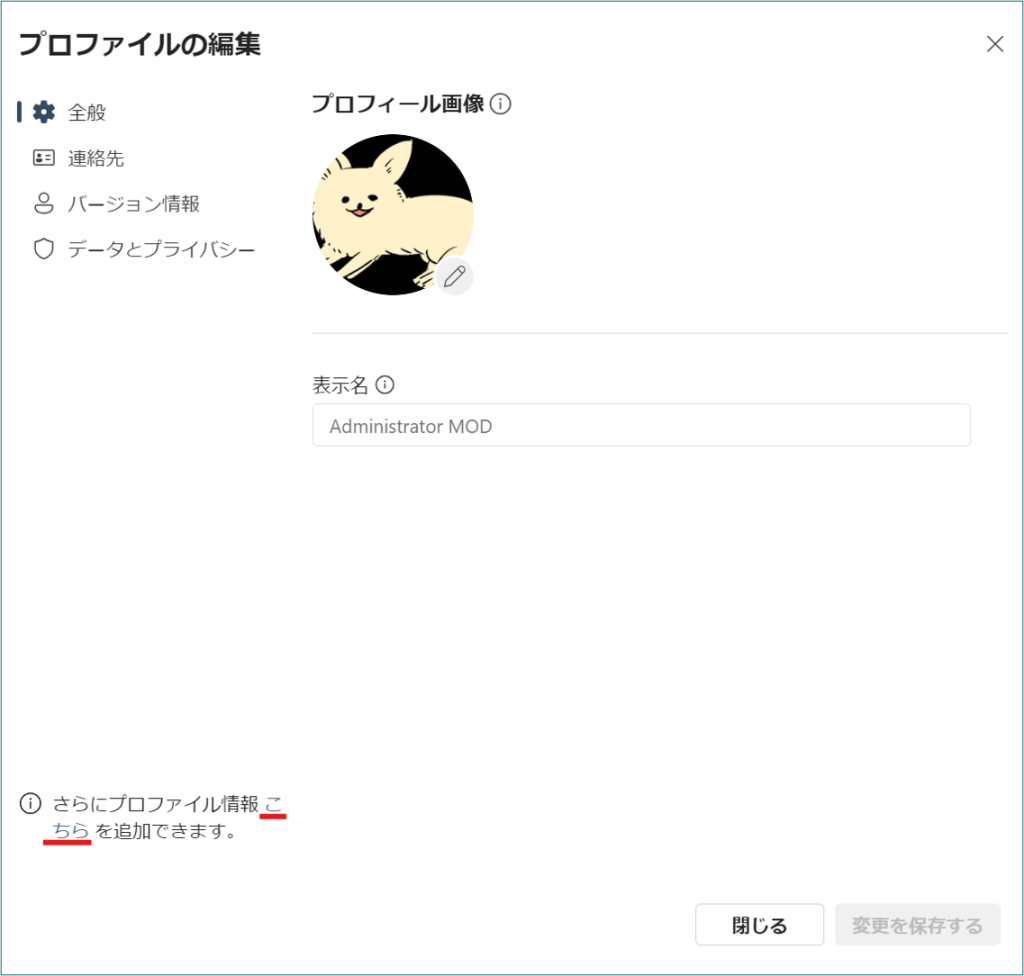
3.【さらにプロファイル情報 こちら を追加できます】の表示の中の【こちら】をクリックします。
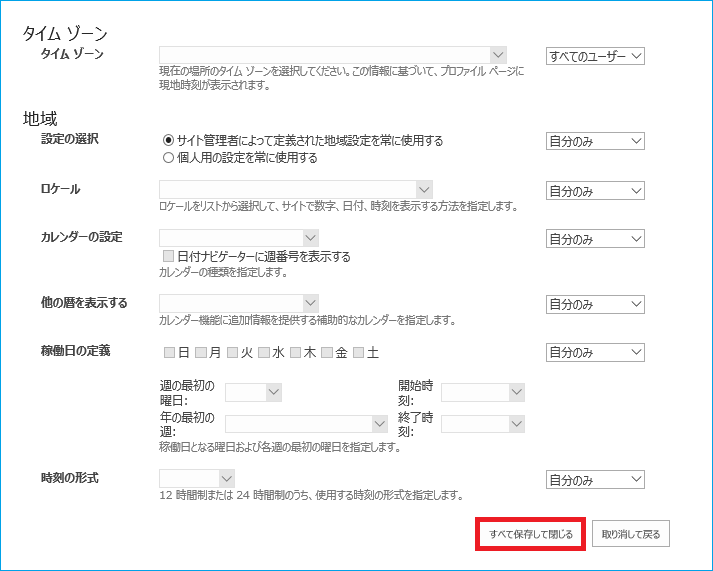
4.「詳細の編集」が開きます。①【…】をクリックし、②【言語と地域】を選択します。

5.新しい言語の選択の右にある【▽】をクリックします。
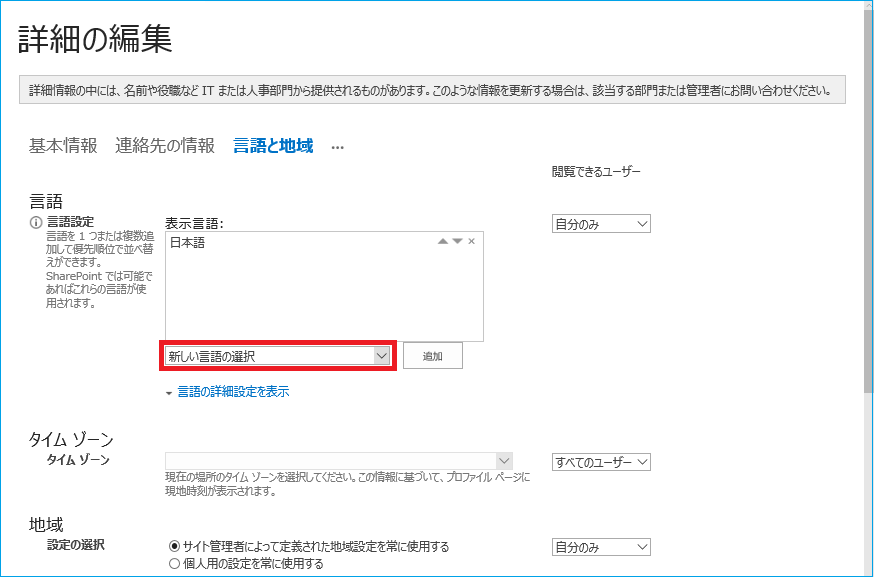
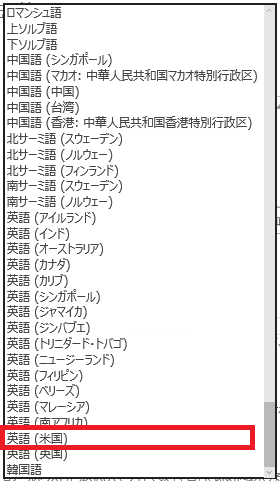
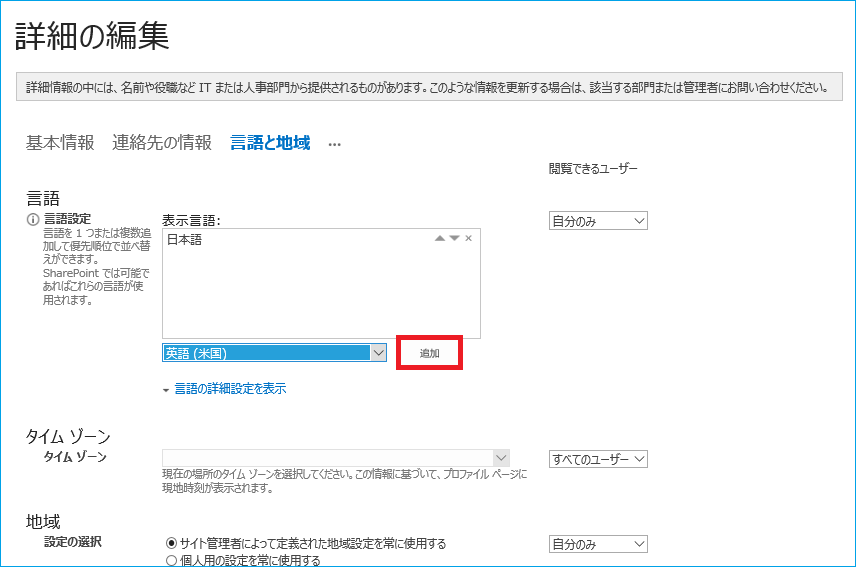
6.表示された一覧から使用したい言語を選択します。ここでは、【英語(米国)】を選択し、【追加】をクリックします。
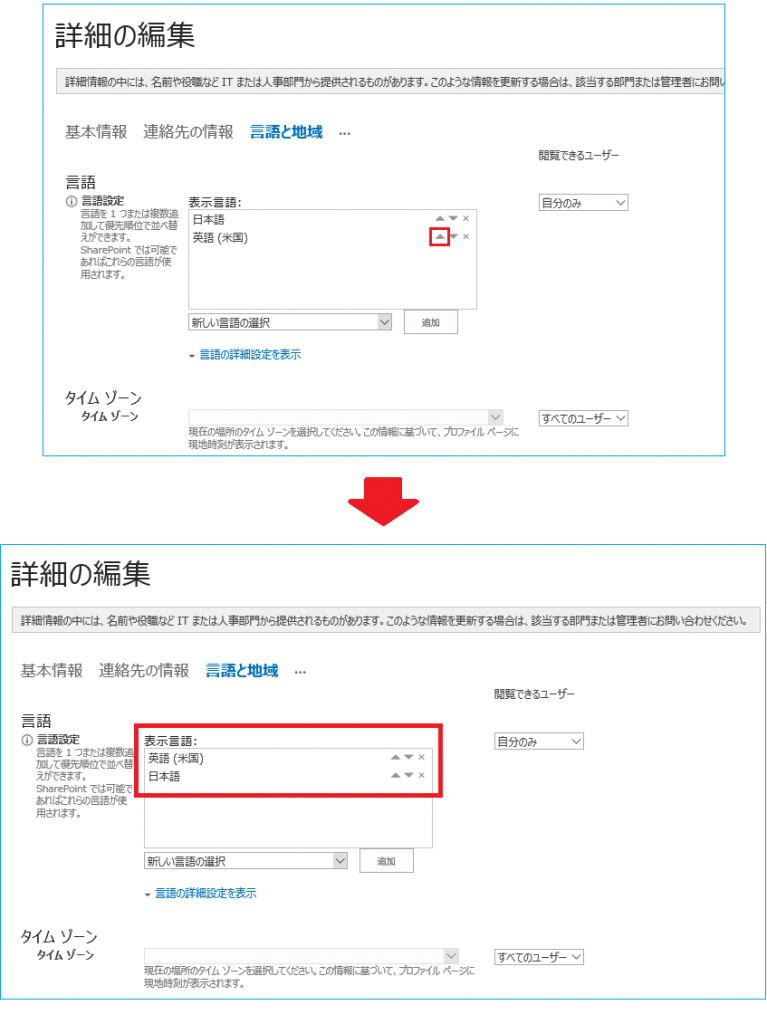
7.[表示言語]に複数の言語を追加した場合は、上下の矢印 を使って言語を使う優先順位を並び替えることができます。ここでは、英語の上矢印をクリックして英語を最優先言語にします。言語を削除するには、該当する言語の【×】をクリックします。
8.【すべて保存して閉じる】をクリックします。
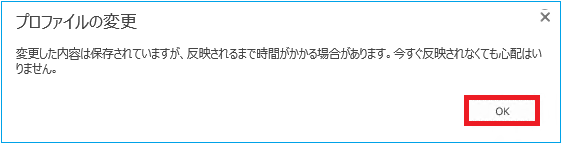
9.『プロファイルの変更』ポップアップが表示されたら【OK】をクリックします。
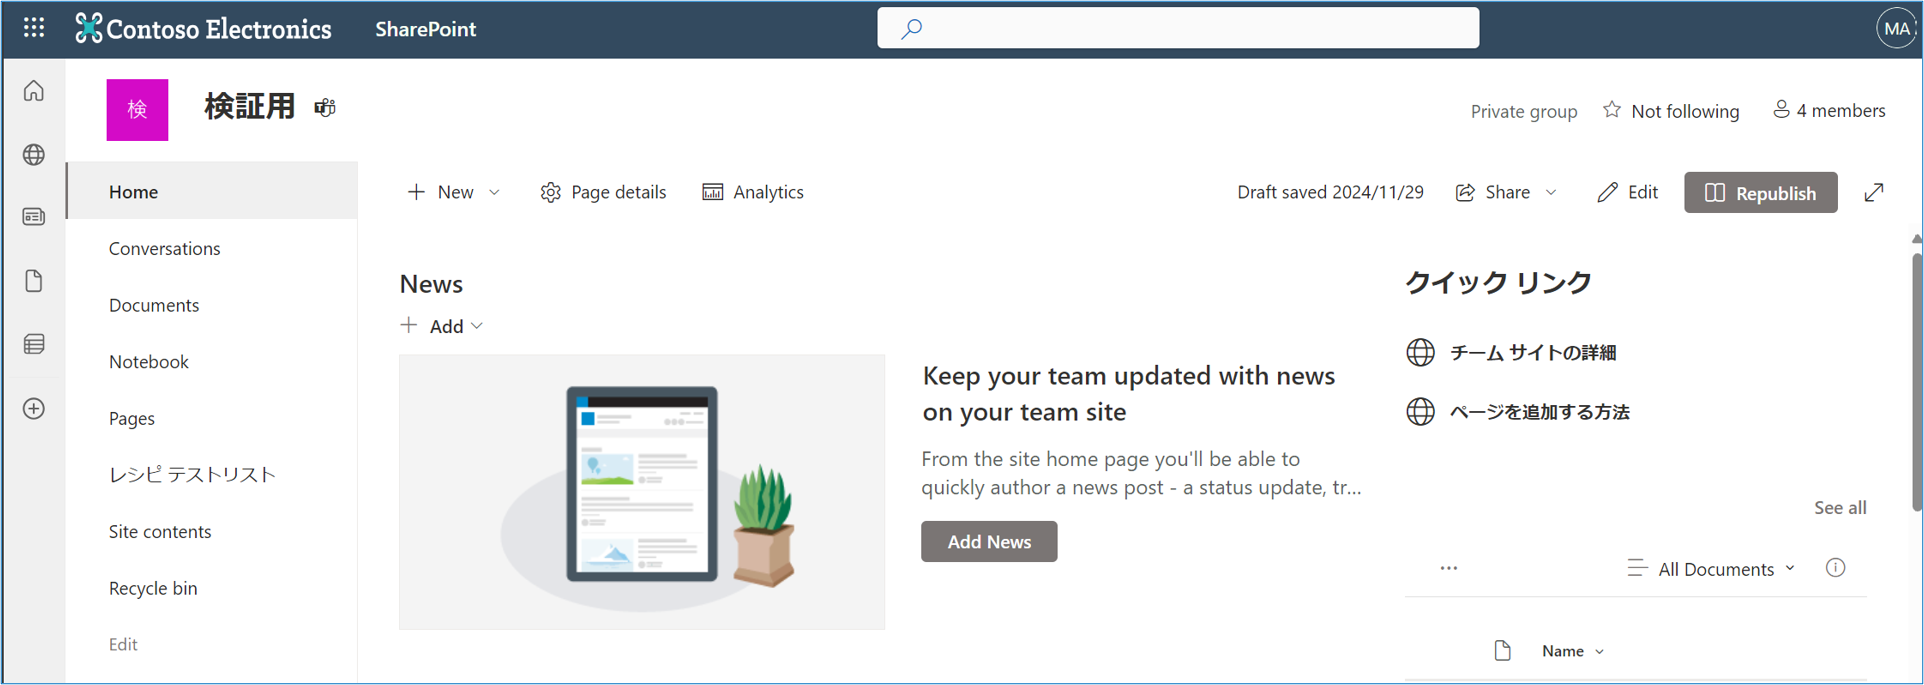
10.変更が反映されると、以下の様に表示が変わります。
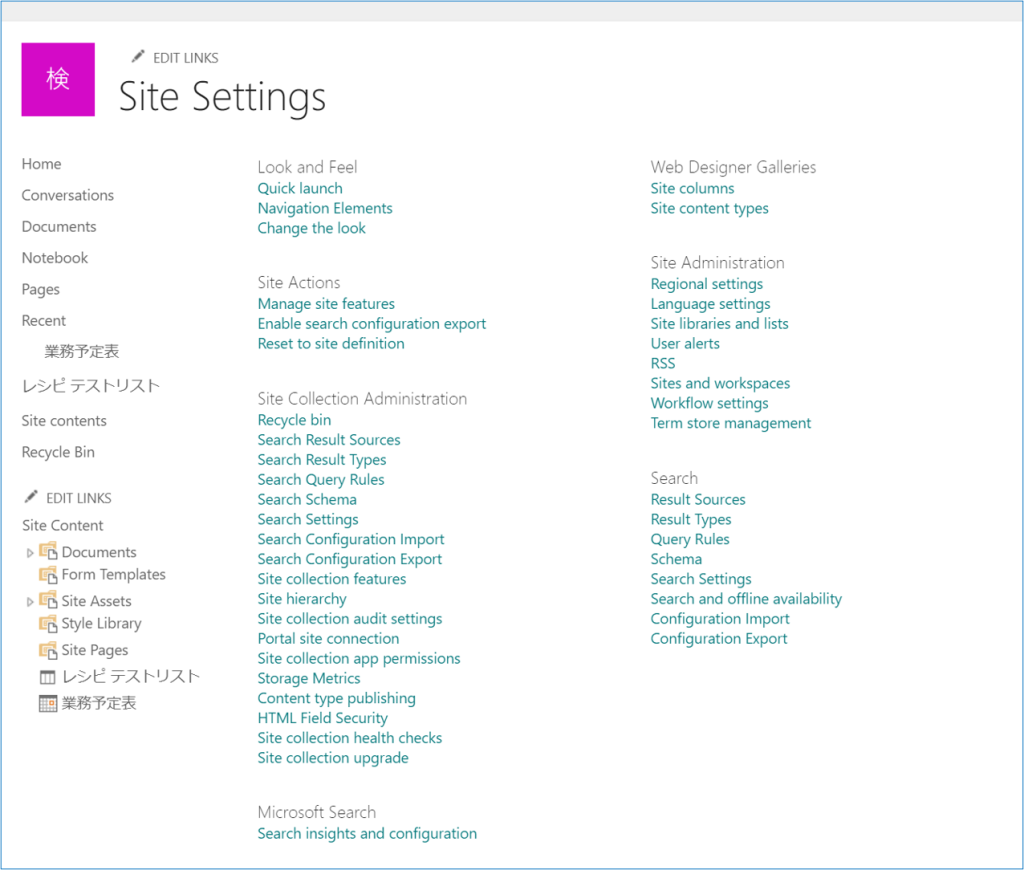
サイトの設定を確認
1.管理権限を持つアカウントで SharePoint にアクセスし、設定を確認したいサイトを開きます。
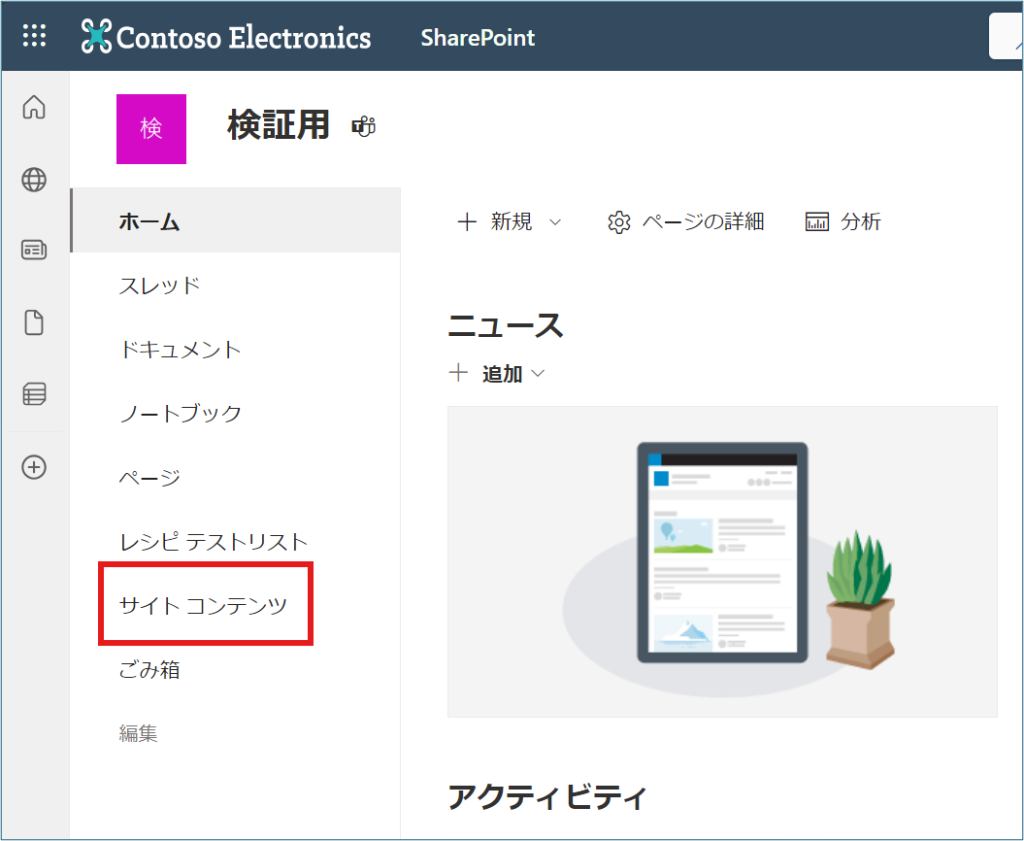
2。次に【サイトコンテンツ】を選択します。
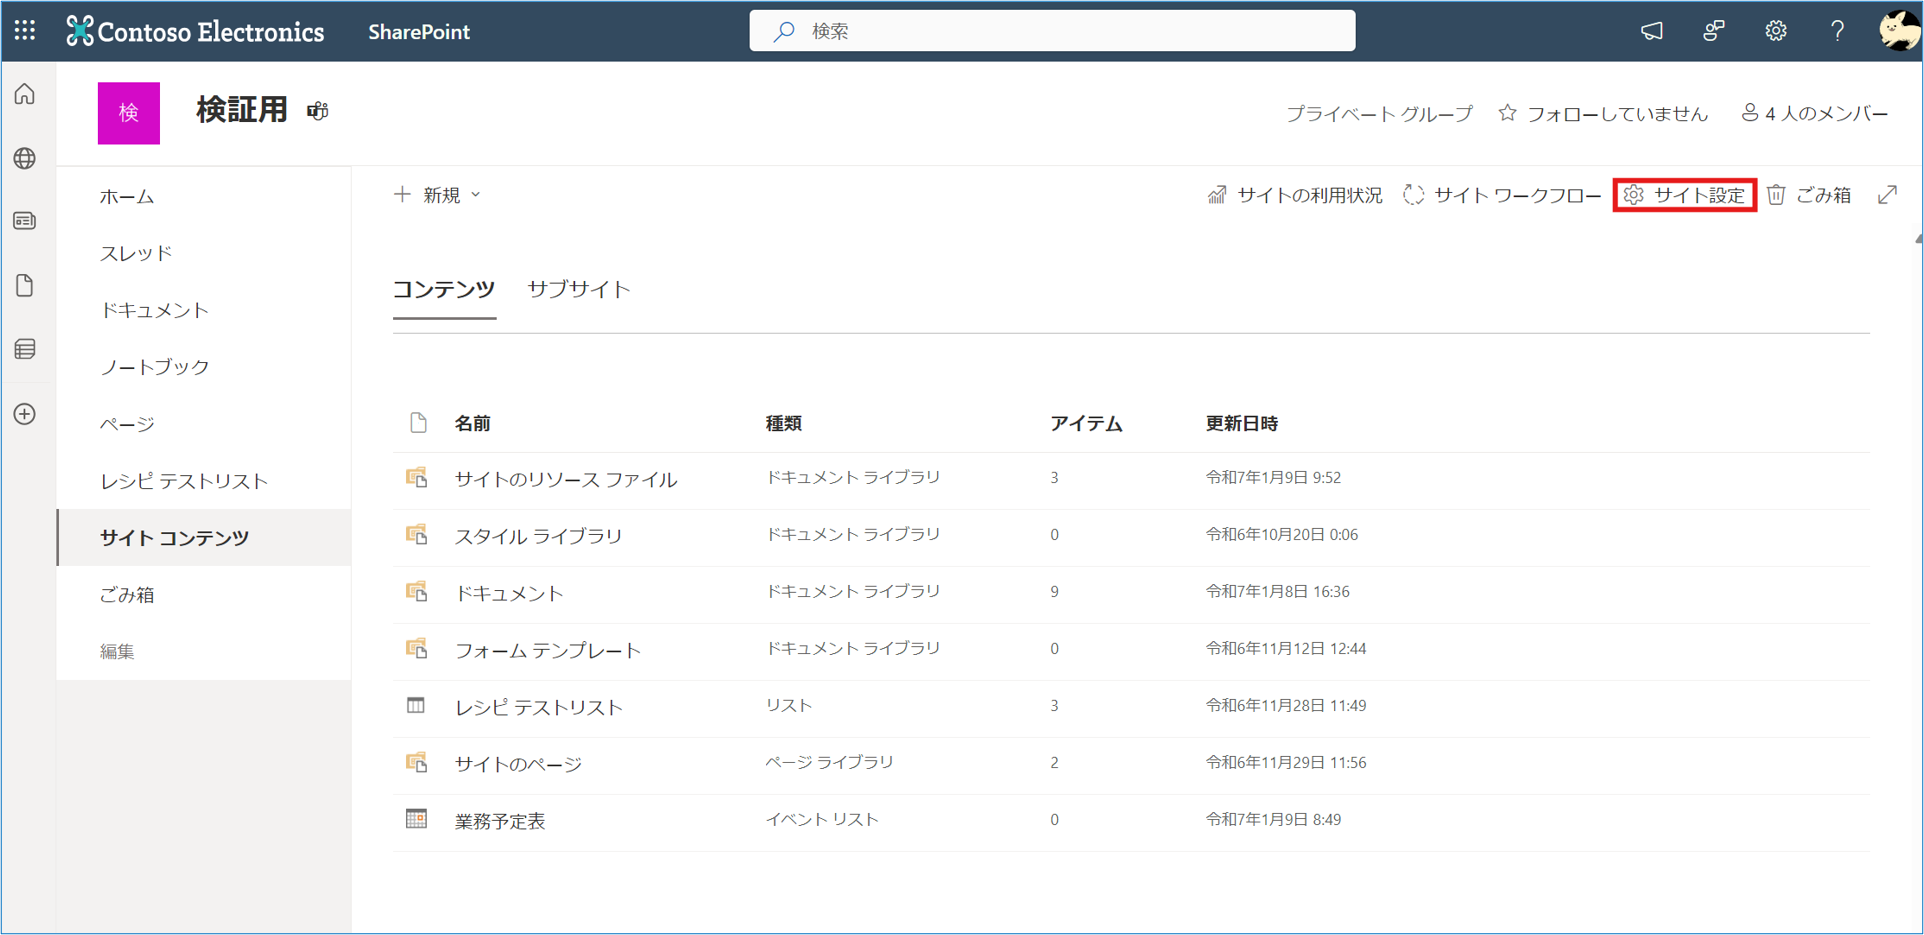
3.次に【 サイト設定】を選択します。
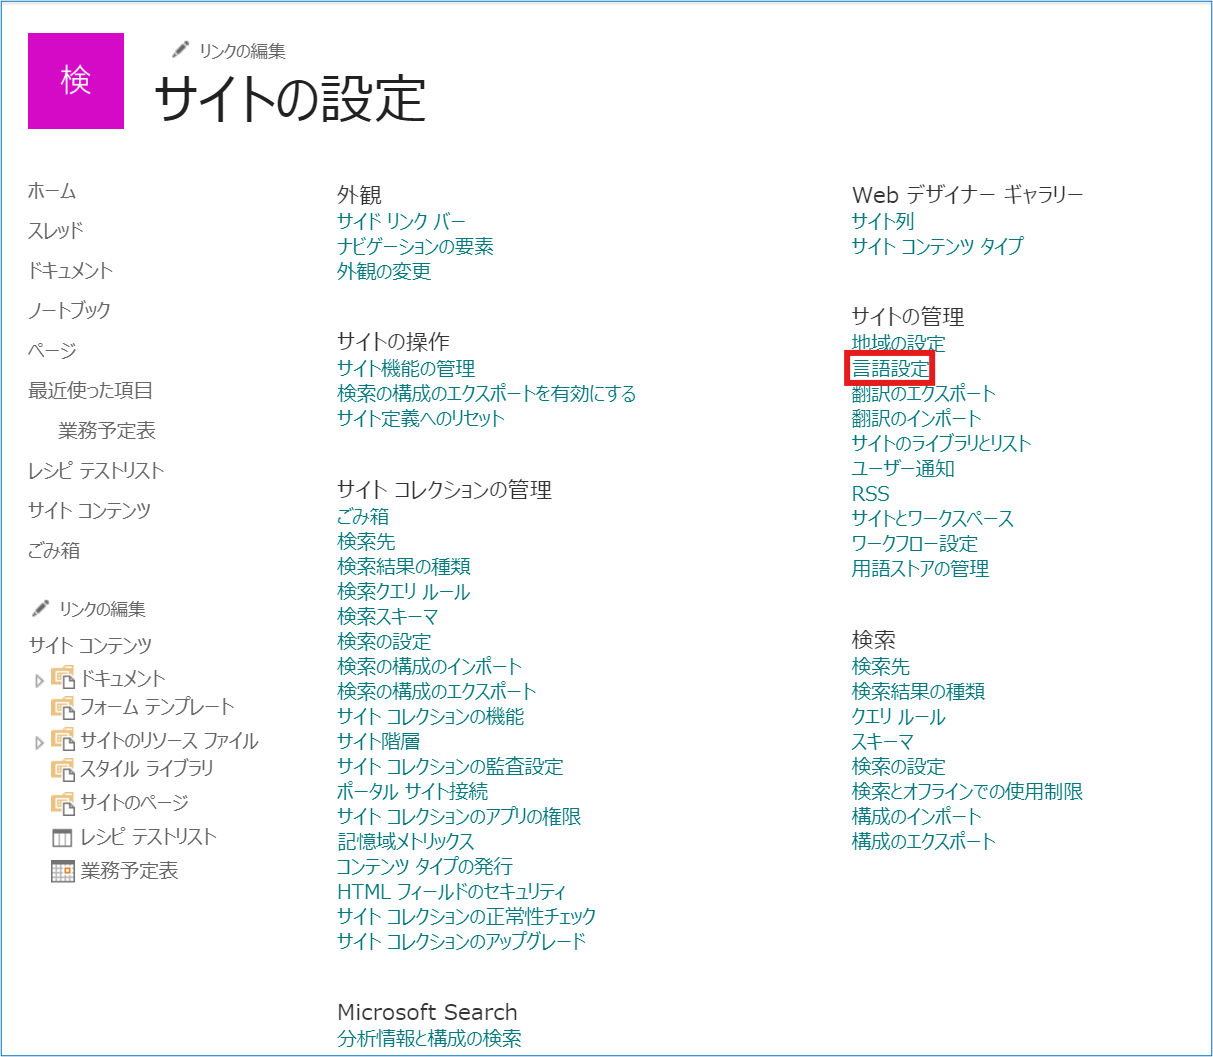
4.サイトの設定が開きましたら、[サイトの管理]カテゴリにある【言語設定】をクリックします。
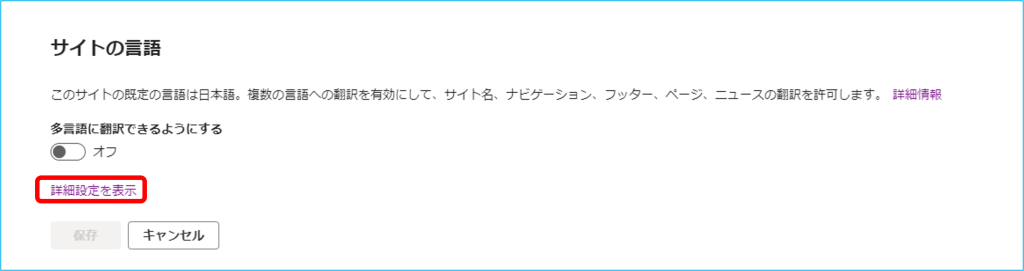
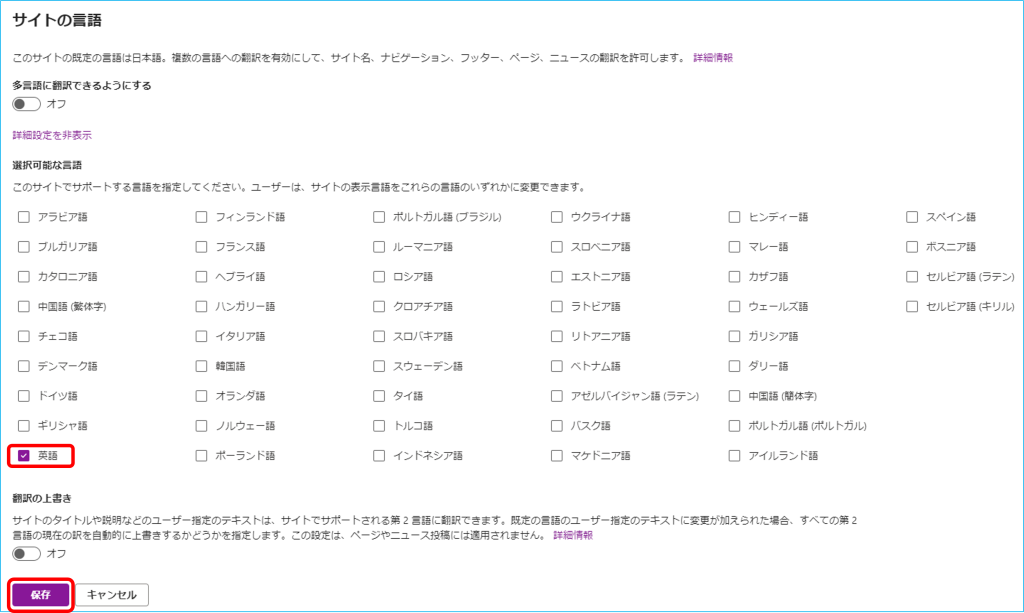
5.「サイトの言語」画面が表示されたら、「詳細設定を表示」をクリックします。
6.選択可能な言語が表示され、その中から「英語」にチェックを付けて、「保存」をします。
7.完了すると、下記の画面のように英語表記になります。