Outlookでメールを作成する際には、元々「宛先」、「CC」の表示しかありません。「差出人」を変更してメールを送信する際や「BCC」を使用したい場合の設定手順をご紹介します。
・Outlookデスクトップ版の設定手順
・Outlook on the web版の設定手順
Outlook デスクトップ版の設定手順
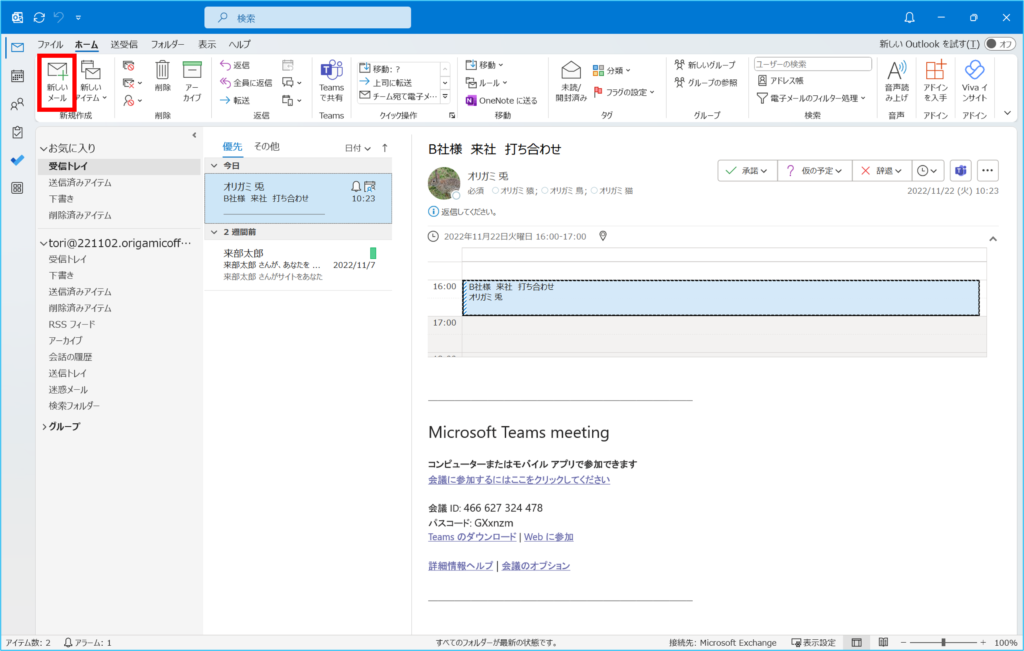
1.Outlookを起動し、「新しいメール」をクリックします。
![](https://livestylewebsitestorage.blob.core.windows.net/livestylewebsitescontainer/2022/11/want-to-see-the-from-feed-also-bcc-1-1024x651.png)
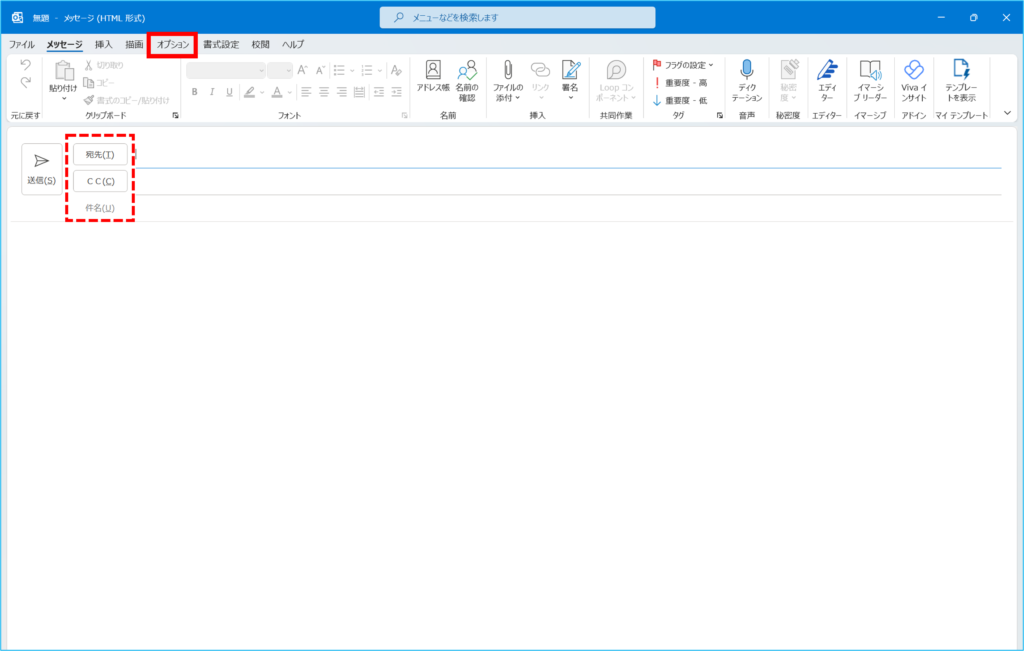
2.新規メールの作成画面で【オプション】タブをクリックします。
![](https://livestylewebsitestorage.blob.core.windows.net/livestylewebsitescontainer/2022/11/want-to-see-the-from-feed-also-bcc-2-1024x651.png)
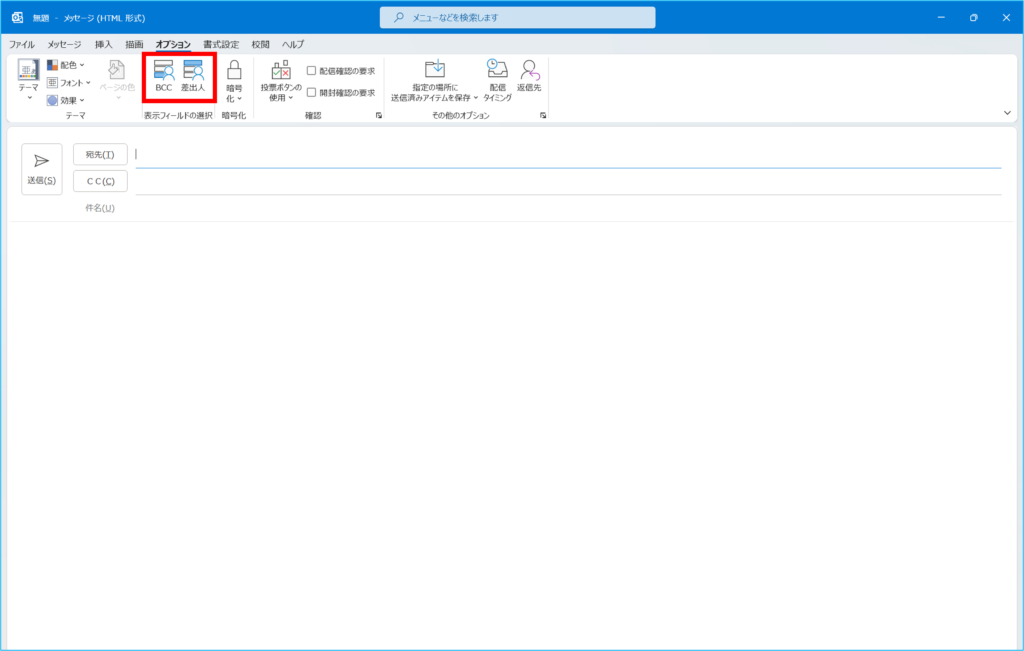
3.表示フィードの選択欄から、「BCC」、「差出人」を選択します。
![](https://livestylewebsitestorage.blob.core.windows.net/livestylewebsitescontainer/2022/11/want-to-see-the-from-feed-also-bcc-3-1024x651.png)
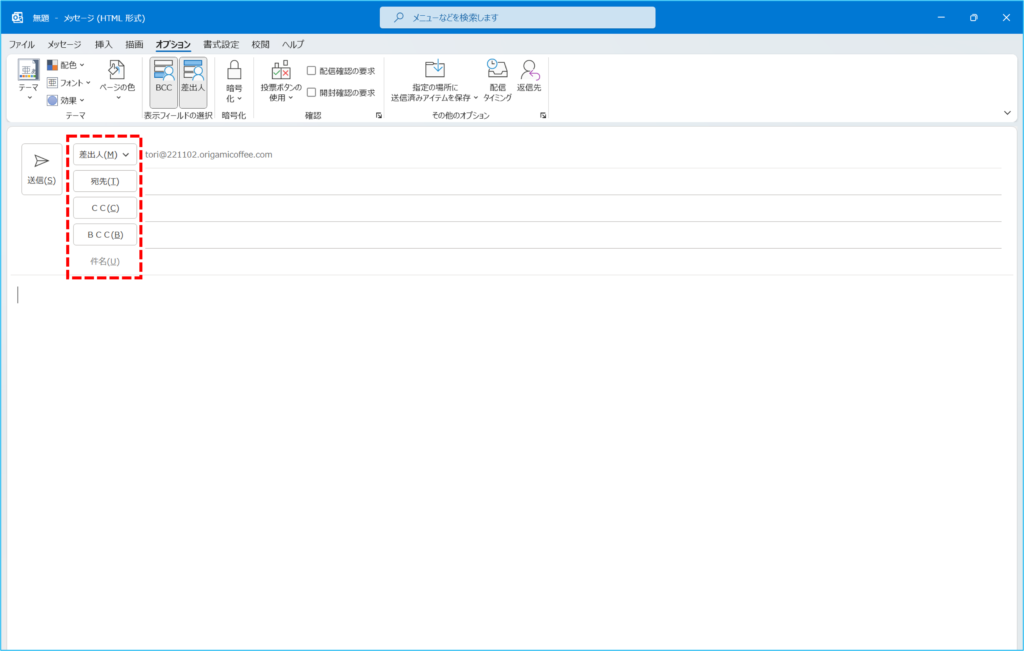
4.選択が完了すると、「差出人」、「宛先、「CC」、「BCC」、「件名」の順に表示が変更されるようになります。
![](https://livestylewebsitestorage.blob.core.windows.net/livestylewebsitescontainer/2022/11/want-to-see-the-from-feed-also-bcc-4-1024x651.png)
Outlook on the web 版の設定手順
https://www.office.com/ へアクセスし、Microsoft 365にサインインします。
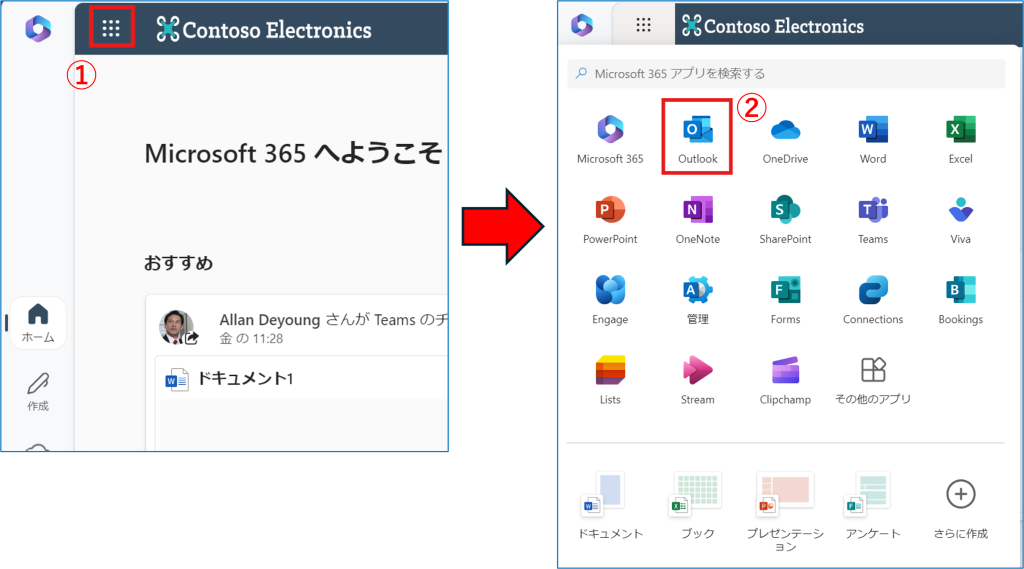
①アプリ起動ツールを選択後、②【Outlook】アプリを開きます。
![](https://livestylewebsitestorage.blob.core.windows.net/livestylewebsitescontainer/2021/11/inserting-a-fixed-sentence-when-composing-an-email-my-template_001-1024x569.png)
<設定から表示する場合>
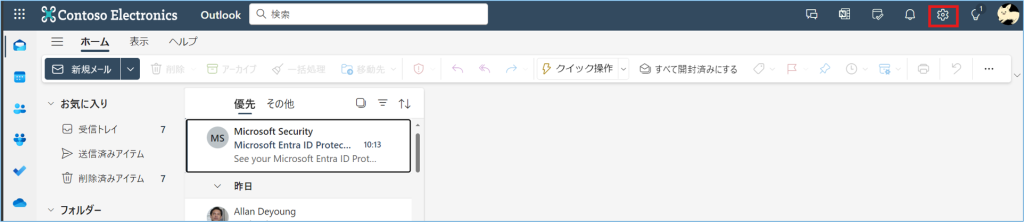
1.設定アイコンをクリックし、設定画面を開きます。
![](https://livestylewebsitestorage.blob.core.windows.net/livestylewebsitescontainer/2022/10/always-add-a-teams-meeting-link-to-the-appointment_001-1024x222.png)
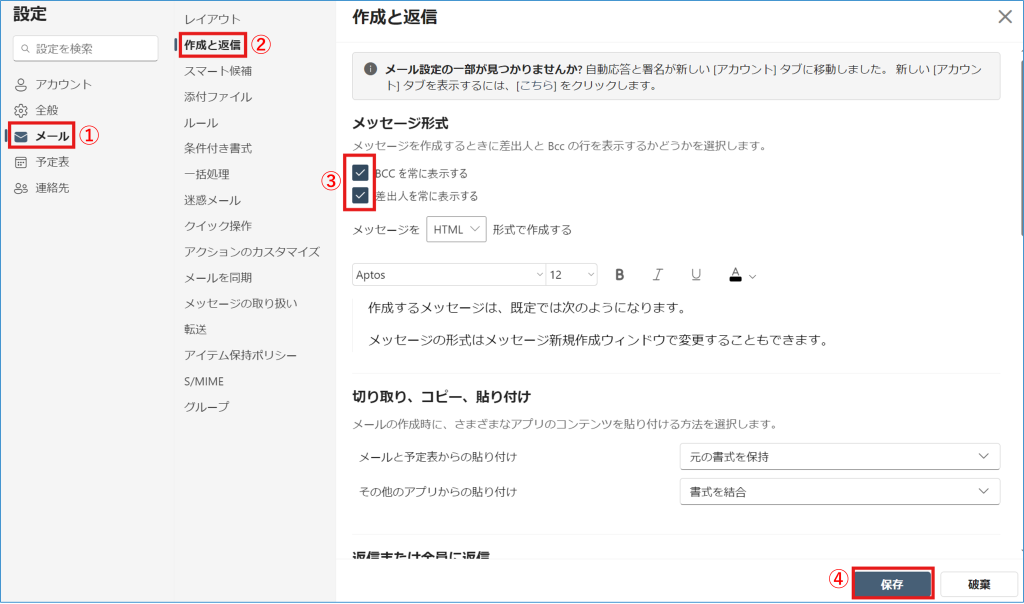
2.①【メール】項目より、②【作成と返信】を開きます。
メッセージ形式内にある、③【BCCを常に表示する】、【差出人を常に表示する】にチェックをし、
④【保存】をクリックします。
![](https://livestylewebsitestorage.blob.core.windows.net/livestylewebsitescontainer/2022/11/always-add-a-teams-meeting-link-to-the-appointment_003-1024x604.png)
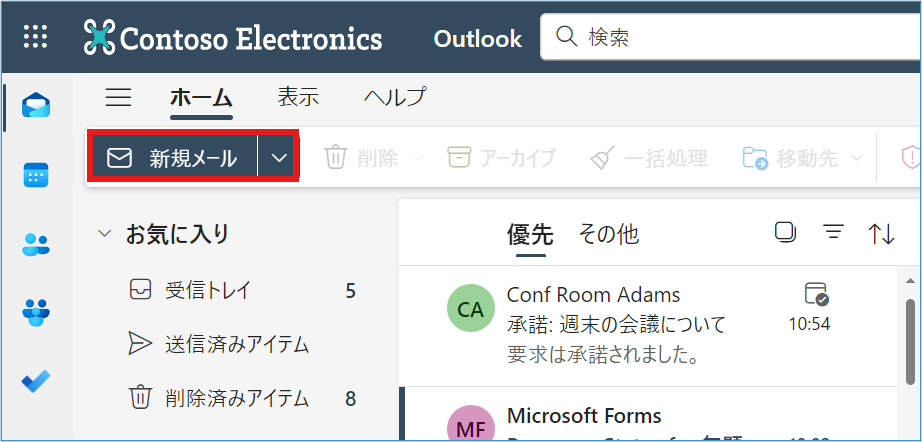
3.メール画面に戻りましたら、【新規メール】をクリックします。
![](https://livestylewebsitestorage.blob.core.windows.net/livestylewebsitescontainer/2021/11/inserting-a-fixed-sentence-when-composing-an-email-my-template_002.png)
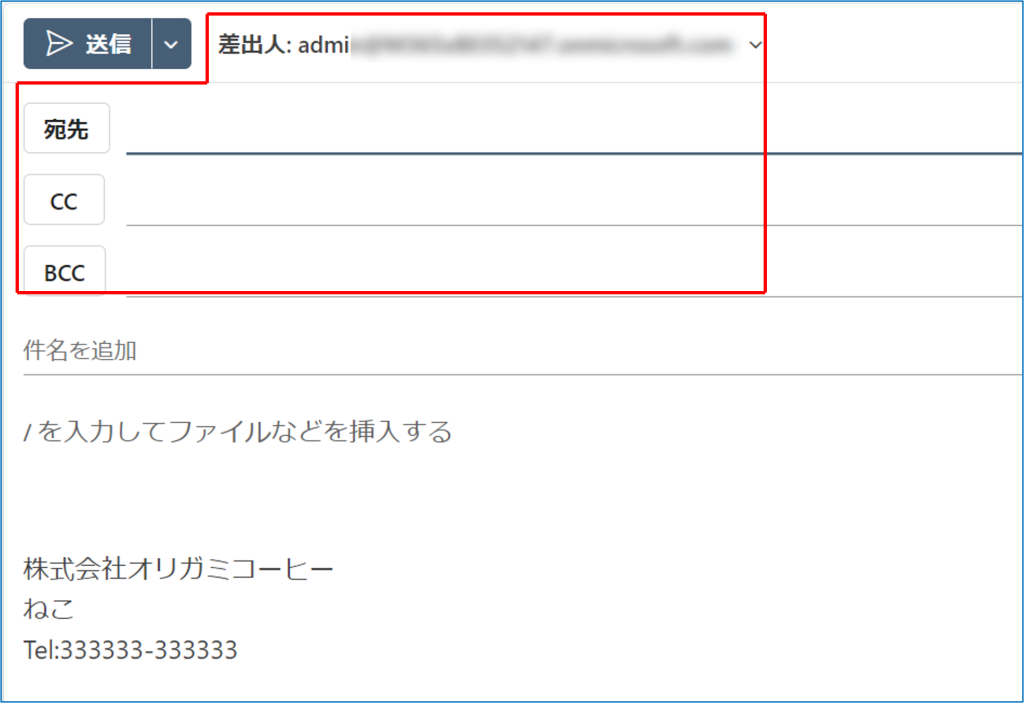
4.メール新規作成画面が表示され、「差出人」、「宛先」、「CC」、「BCC」のような順に変更されます。
![](https://livestylewebsitestorage.blob.core.windows.net/livestylewebsitescontainer/2022/11/always-add-a-teams-meeting-link-to-the-appointment_004-1024x703.png)
<オプションタブから表示する場合>
1.【新規メール】をクリックします。
![](https://livestylewebsitestorage.blob.core.windows.net/livestylewebsitescontainer/2021/11/inserting-a-fixed-sentence-when-composing-an-email-my-template_002.png)
2.新規メールの画面では、宛先・CCの表示はありますが、BCCの表示はありません。
![](https://livestylewebsitestorage.blob.core.windows.net/livestylewebsitescontainer/2022/11/always-add-a-teams-meeting-link-to-the-appointment_005-1024x280.png)
※宛先の右側に、BCCの表示があります。ここをクリックしてBCCを表示することもできます。
3.①【オプション】タブから、②【BCCを表示】にチェックを入れると③宛先・CC・BCCの表示になります。
![](https://livestylewebsitestorage.blob.core.windows.net/livestylewebsitescontainer/2022/11/always-add-a-teams-meeting-link-to-the-appointment_006-1024x282.png)