1.Outlook を起動し、予定表を開きます。
①『予定表の管理』タブの【予定表の追加】をクリックします。②プルダウンから【共有の予定表を開く】をクリックします。
![](https://livestylewebsitestorage.blob.core.windows.net/livestylewebsitescontainer/2021/12/権限を付与された共有の予定表を開くには(Outlook)1新-1024x328.png)
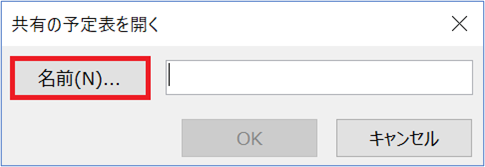
2.『共有の予定表を開く』画面が表示されます。ここで【名前】をクリックします。
![](https://livestylewebsitestorage.blob.core.windows.net/livestylewebsitescontainer/2021/12/open-a-calendar-for-a-privileged-share-outlook-2.新.png)
3.次に①アドレス帳から権限を与えてくれたユーザー名を選択し、②【OK】をクリックします。
![](https://livestylewebsitestorage.blob.core.windows.net/livestylewebsitescontainer/2021/12/権限を付与された共有の予定表を開くには(Outlook)3新-1024x583.png)
4.『共有の予定表を開く』画面に戻ります。選択したユーザー名を確認し、【OK】をクリックします。
![](https://livestylewebsitestorage.blob.core.windows.net/livestylewebsitescontainer/2021/12/権限を付与された共有の予定表を開くには(Outlook)4新.png)
5.予定表に戻ると、共有された予定表の詳細を確認できます。
![](https://livestylewebsitestorage.blob.core.windows.net/livestylewebsitescontainer/2021/12/権限を付与された共有の予定表を開くには(Outlook)5新-1024x638.png)
権限を付与されたメールを開くには⇒こちら