Outlookクライアント(デスクトップ版)の稼働時間の設定方法をご紹介いたします。
※変更した設定は、Outlook on the web にも反映されます。
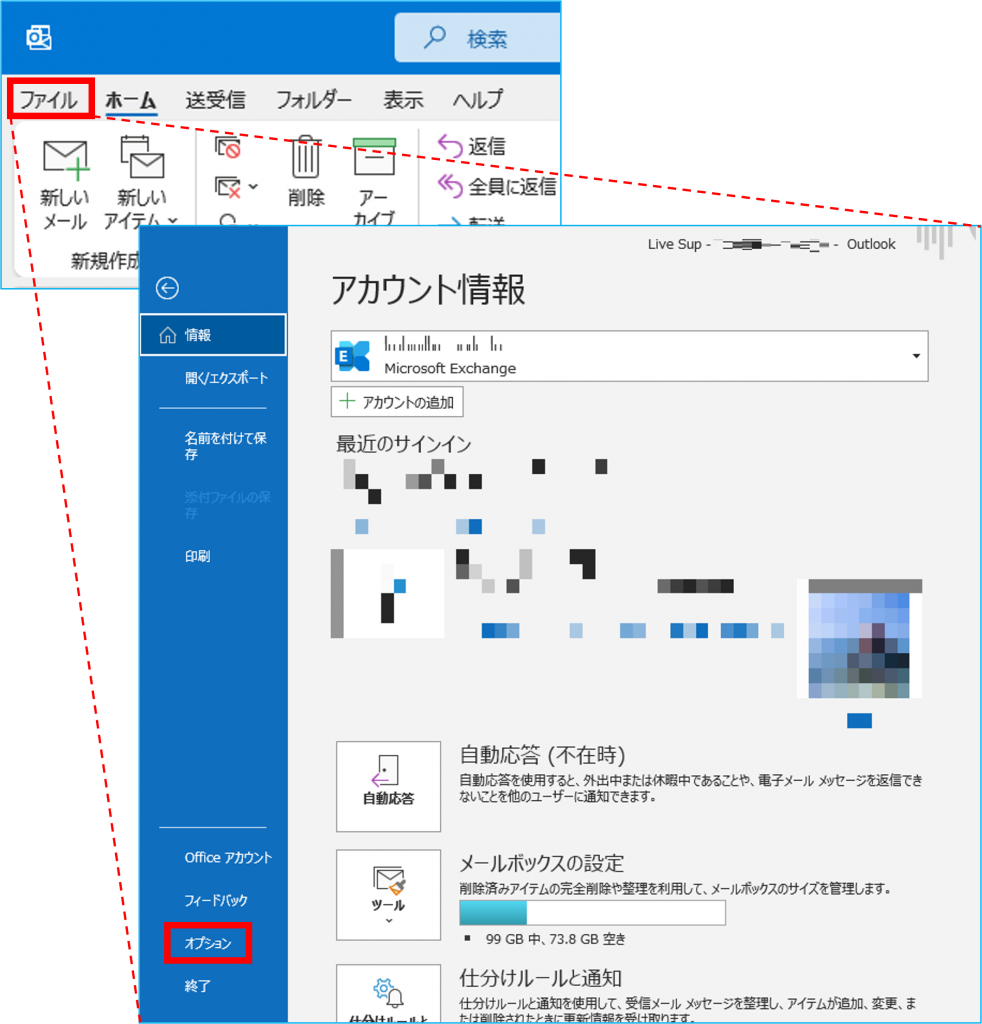
1.Outlook画面より、【ファイル】をクリックし、【オプション】を開きます。
![](https://livestylewebsitestorage.blob.core.windows.net/livestylewebsitescontainer/2021/12/setting-the-operating-time-outlook-desktop-001-982x1024.png)
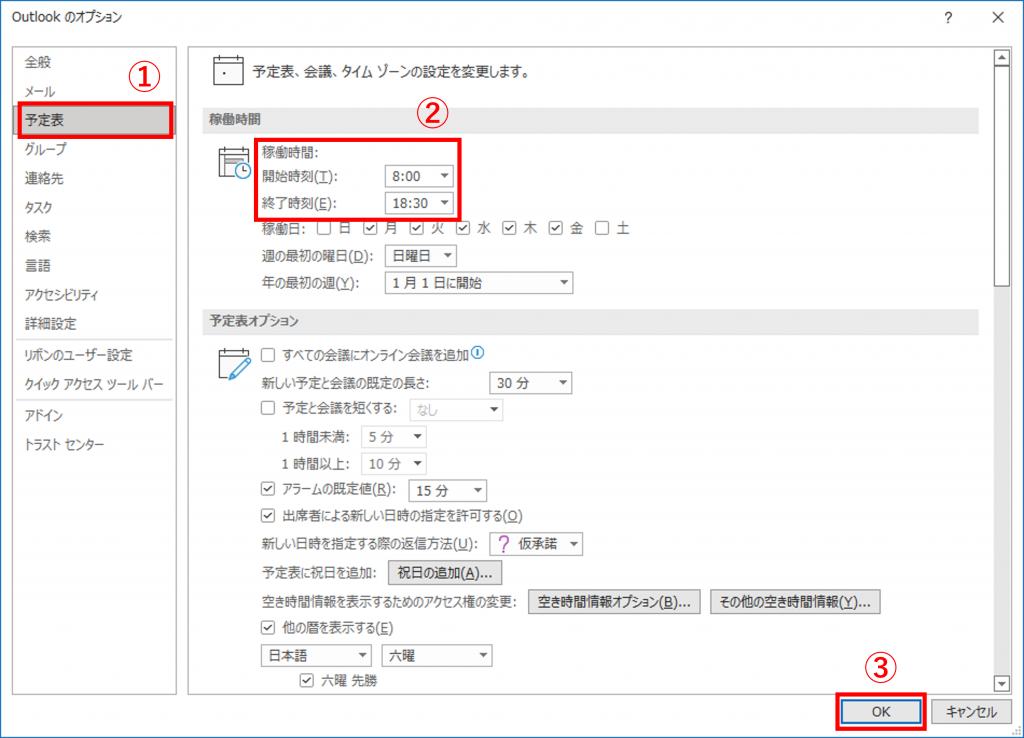
2.「Outlookのオプション」が開いた後
①【予定表】をクリックします。
②【稼働時間】の開始と終了時刻を設定します。
③【OK】をクリックして閉じます。
![](https://livestylewebsitestorage.blob.core.windows.net/livestylewebsitescontainer/2021/12/setting-the-operating-time-outlook-desktop-002-1024x738.png)
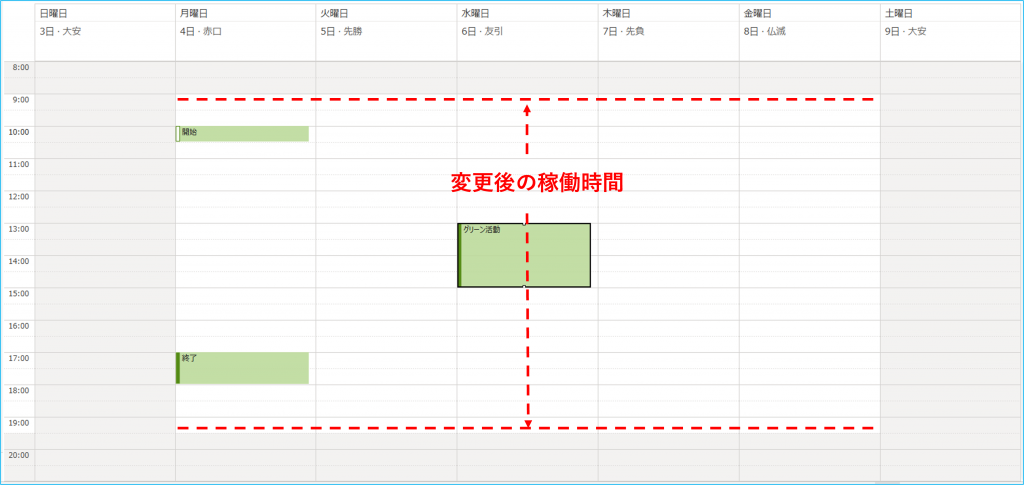
3.稼働時間設定後、下図のように予定表内の稼働時間範囲が変更されます。
図1.変更前の画面 (8:00 – 18:30)
![](https://livestylewebsitestorage.blob.core.windows.net/livestylewebsitescontainer/2021/12/setting-the-operating-time-outlook-desktop-003-1024x469.png)
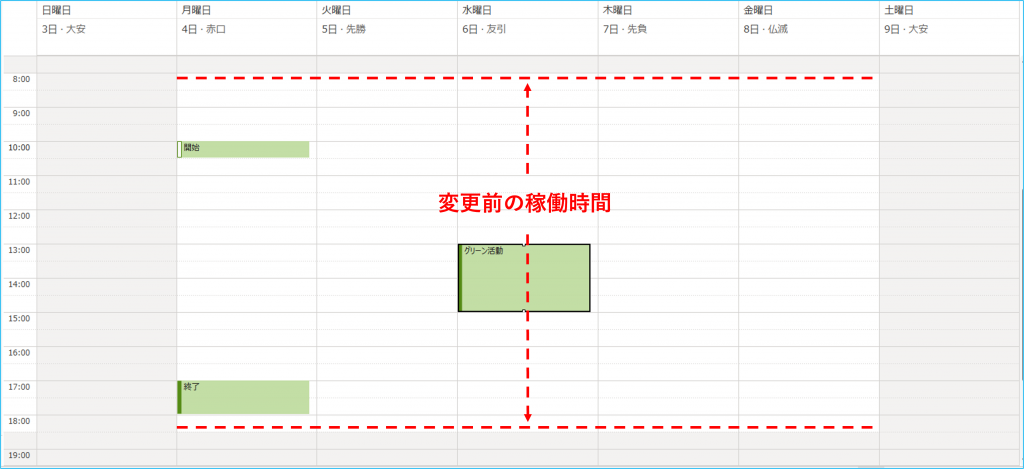
図2.変更後の画面 (9:00 – 19:30)
![](https://livestylewebsitestorage.blob.core.windows.net/livestylewebsitescontainer/2021/12/setting-the-operating-time-outlook-desktop-004-1024x485.png)